Originally posted on 10th July 2015 and updated on 11th May 2016: There has been some controversy recently about StartSSL and their key management practices. You can google it and read up if you want but I’m going to continue using them since it’s easy, free and I’m just after the simplest of domain validation keys to make sure any traffic is encrypted.
Ideally I would use LetsEncrypt to generate my keys but at the time of writing there is no simple mechanism to do this on a self hosted WordPress blog at NearlyFreeSpeech. There are a number of semi-complex work arounds but since I already know how to do it this way I’m going to stick with it for the coming year. Hopefully next year I’ll be able to move onto LetsEncrypt.
When I first wrote this post StartSSL’s site looked like something from the 00’s so some of the images are outdated. I have updated some of these below but some are still the older versions. In general, the guidance and instructions are still accurate but since StartSSL have updated their site, some of the instructions for where to click on their site may have changed slightly. Just use your initiative and you should be okay!
This is actually quite tricky to figure out (but not that complex to actually do) and there are limited resources around to guide you through it so follow closely as it is worth it in the end to have a nice HTTPS website…
To access your NFS hosted sites using an encrypted connection you need to do some configuration. Note that NFS specifies some important caveats for using TLS though…
-
TLS is available on an experimental basis. We make no guarantee that it works properly, or that we will continue to offer it.
-
TLS is implemented using the SNI (Server Name Indiciation) extension of TLS. This has widespread modern browser support, but it is not yet universal.
-
While there is currently no extra charge for TLS, that is unlikely to remain true. The encryption process requires extra CPU and at some point we will add a small charge to account for that.
-
We have implemented TLS using front-end wrappers. The last hop of an TLS request traverses part of our network unencrypted.
-
Because certificates are typically licensed for use only on a single host, TLS has an additional single point of failure that our regular hosting does not.
-
Our implementation of TLS has not been audited for PCI DSS compliance for credit card processing, and we do not support its use for that purpose.
But notwithstanding this let’s show you how to set it up. I’m going to walk through the process I used to set up this site’s HTTPS access. I already have this site address configured as an alias for the *.nfshost.com site that NFS initially sets you up with. I’ll assume you already know how to do this.
First we need an SSL certificate. I have used a free one from StartSSL (https://www.startssl.com/?app=1). To be clear though, this is the lowest category of SSL certificate, it only ensures that the traffic is encrypted and that I own the domain name, also the free cert only lasts for 1 year before you need to renew it. You can pay for different certificates which have much more enhanced validation and/or last for longer.
Go to the StartSSL site and go to the control panel (https://www.startssl.com/?app=12). Click the sign up option. Fill in your details on the next page. It is important that StartSSL get correct identification info from people using their service as some of the certificate types they provide require proof of ID. At this point they don’t know what cert you’ll require so they ask you for your correct personal info – after all you may want an extended validation cert at a later date. I understand that they randomly sample registrations to make sure you haven’t filled in rubbish.
You’ll get an email with a validation code which you should now enter in the box presented:


At this point my application was flagged for review by the StartSSL staff. I believe that new registrations are randomly sampled. My verification took about ten minutes (even at 8 o’clock on a Saturday night – so it’s very quick) then I got an email with a link and another validation code. Follow the link and enter the code.
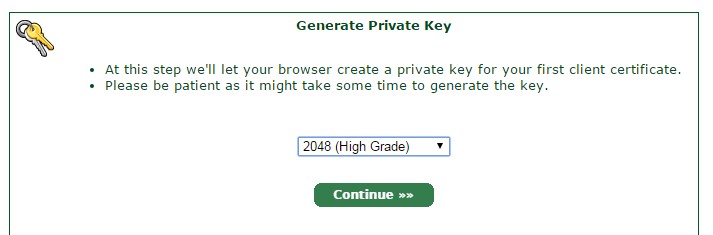
Next your browser will be tasked to generate a key for access to the StartSSL site. Use the 2048 option and hit Continue.
Then click install to install this certificate.
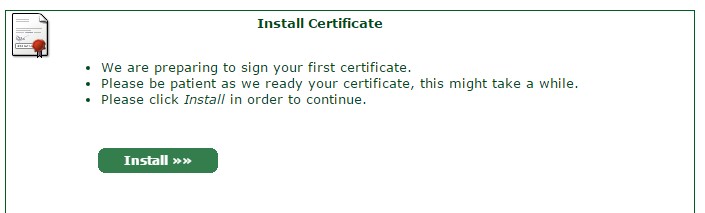
Edit 11th May 2016: These are older images from last year’s StartSSL site, I didn’t have to redo this step in 2016 since my existing site authentication cert was still valid so I haven’t updated these with new screenshots. Sorry!
Note that this is not the SSL cert which will be used for your site’s encryption. The cert you just installed is the validation between your computer and the StartSSL site to access the StartSSL Control Panel. This is essentially a replacement for a username and password to access StartSSL. You should definitely backup this cert in case you later change computers, reinstall your OS, use a different browser, …
Backing up the cert will differ by browser (https://www.startssl.com/?app=25#4) but in Chrome I can export the cert to somewhere safe by:
Google Chrome: Click on the “Options” icon in the upper left (. Select “Settings” from the menu. Click on”Advanced Settings” and then in the HTTPS/SSL section, click on the “Manage certificates…” button. Select the certificate(s) you want to export, click on the “Export…” button and follow the prompts from the Export Certificate Wizard that pops up. Make sure to include the private key as well, export as .p12 file.
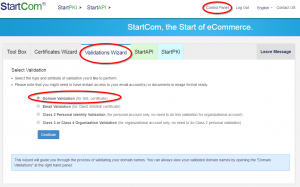
Now, let’s create our SSL cert for our NFS website. Click on the Control Panel button in the top bar. Then the Validations Wizard. Choose the Domain Name Validation and enter your web site name (without the ‘www’). StartSSL then gives you a choice of three email addresses which you can use to have the validation code sent to. By receiving at one of the addresses you are proving ownership of the domain.

At this point I quickly had to create one of these users in my domain’s email system. I use Google Apps as the email provider for my domain.
Once your code arrives copy it and enter it in the StartSSL page to validate your ownership of the domain.
Now we have to run a few commands on the NFS server. Start an SSH session into your site and first create a directory /home/protected/ssl on your site…
mkdir -p /home/protected/ssl
cd /home/protected/ssl
Run this command to create a local key on your server:
openssl genrsa -out /home/protected/ssl/www.mc-guinness.co.uk.key 2048
Now create a certificate signing request on your server with this command, note that you can mainly just hit enter at each option, although I did pick the correct country. You do need to make sure and set the FQDN (fully qualified domain name = www.yoursite.com) to your site address.
openssl req -new -sha256 -key www.mc-guinness.co.uk.key -out www.mc-guinness.co.uk.csr
Copy your CSR file from your server to a local file, or you can open it on the server in nano or vi/vim. You’ll need the contents of this file in a minute.
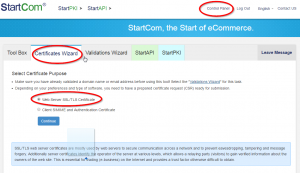
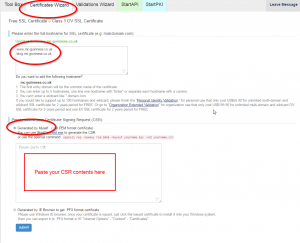
Go back to StartSSL web site and click on Control Panel again, then Certificate Wizard to request a new Web server SSL/TLS certificate.

Enter up to 5 subdomains on the next screen but do enter at least www.yourdomain.com. Adding extra is only useful if you want to use your cert for more than just the www site. For example, maybe you want to use it for blog.yourdomain.com too.
Then select the option to use the CSR generated by yourself (which is what we did in the last step). Then paste in the contents of the CSR, including the header and footer lines (—–BEGIN CERTIFICATE REQUEST—– & —–END CERTIFICATE REQUEST—–).

Click Submit and you’ll be given your cert to download as a zip file. Inside this there are a few different archives to choose from. Extract the apache archive onto your local machine, rename to remove the ‘1_’ and ‘2_’ from the start of the file names, and copy the files into your NearlyFreeSpeech /home/protected/ssl directory.
We also need to create a .chn chain file from the StartSSL CA files. Follow these commands on the NFS server to get the CA files and then cat them together to form the .chn file. Note that you can find the StartSSL CA certs from the toolbox section of the StartSSL Control Panel – the wget command just pulls them straight to the NFS server rather than downloading locally and transferring over.
cd /home/protected/ssl
wget --no-check-certificate https://startssl.com/certs/ca.crt
wget --no-check-certificate https://startssl.com/certs/sca.server1.crt
cat ca.pem sca.server1.crt > www.mc-guinness.co.uk.chn
Note that between 2015 and 2016 these filenames changed so you may need to find the correct files on the StartSSL site to download. Look for the ‘pem‘ encoded versions of:
- the ‘StartCom Certification Authority’ under the ‘Root CA Certificate’ section, and
- the ‘Class 1 DV SSL certificate’ under the ‘Intermediate CA Certificates’ section.
You can test that the chn file you just generated is valid for your certificate using
openssl verify -untrusted www.mc-guinness.co.uk.chn www.mc-guinness.co.uk.crt
Which should return an OK response:
![]()

If you don’t get OK then you have probably concatenated the wrong files. See here for some help: https://faq.nearlyfreespeech.net/full/tlschain#tlschain
This chainfile essentially creates a chain of certificates from the original root CA to your new domain certificate. You could if you wanted now trace the lineage of the certificate’s issue right from a top level trusted certificate authority (look in your browser’s SSL certificate list to see all of these) all the way through to your new certificate. And because we started all the way up the chain with a trusted cert, each cert in turn along the chain becomes trusted as it gets signed by the one above it.
You should now have a number of files in /home/protected/ssl (obviously with your own site’s name instead of mine):
- www.mc-guinness.co.uk.key -> Our private key, a 2048 bit key we generated on the NFS server used to generate the certificate signing request and in turn get a StartSSL signed certificate for our domain.
- www.mc-guinness.co.uk.csr -> The certificate signing request generated on the NFS server using the key above. We gave this to StartSSL who created the certificate below for us.
- www.mc-guinness.co.uk.crt -> Our certificate signed by StartSSL which validates your domain and lets us use HTTPS.
- www.mc-guinness.co.uk.chn -> Our chainfile which links the root CA to your new certificate.
- sca.server1.crt -> StartSSL server Intermediate CA – this certificate signed your new certificate.
- ca.pem -> StartCom Root CA (PEM encoded) – this is the root certificate which signed the StartSSL Intermediate Server CA.
Make sure our permissions are correct on the SSL cert files…
chmod 0644 /home/protected/ssl/*
chmod 0755 /home/protected/ssl
Go to https://members.nearlyfreespeech.net/[YOUR_NFS_ACCOUNT]/support/assist?tag=ssl and submit an assistance request to NFS. They will take a look at your SSL cert files and do the relevant behind the scenes work to get SSL encryption working. The only thing I put in the message box was my site’s name (www.mc-guinness.co.uk), I didn’t want to add more text in case the action was automated and any extra text messed up the automation.
The above was the old way of getting NearlyFreeSpeech to set up SSL. Detailed instructions for the new setup process are here: https://members.nearlyfreespeech.net/faq?q=TLSSetup#TLSSetup
In summary, you can do it yourself via the command line or by uploading your TLS files via the ‘Site Information’ panel in the membership area of NearlyFreeSpeech.
We’re going to use the command line. I don’t know if the command will work using the existing filenames as they are or if we need to change them, I changed them just to be sure it would work.
cp www.mc-guinness.co.uk.key privkey.pem
cp www.mc-guinness.co.uk.crt cert.pem
cp www.mc-guinness.co.uk.chn chain.pem
cat privkey.pem cert.pem chain.pem | nfsn -i set-tls
You’ll be informed once the TLS service is set up. You can test it by putting a simple index.html file on your site (put it in the /home/public folder). Access it using HTTP then try again using HTTPS. Both should now work. Note that you may still get a warning in the browser address bar which will highlight that your certificate is not a very strong one – that’s okay, as noted earlier, we only wanted a basis cert which would encrypt traffic not a top-of-the-line, really expensive one.
Once it is all set up, delete the files in the /home/protected/ssl directory as requested by NFS:
“Once the setup is complete, remove the files from your protected/ssl directory. TLS is performed on a separate machine which keeps local copies of the necessary keys and certificates.”
If you want to redirect users to use an HTTPS version of your site you can do that easily by amending the .htaccess file in your site root directory. There is a very easy to follow guide here (https://members.nearlyfreespeech.net/faq?q=EnforceSSL#EnforceSSL) and I simply added the following to my .htaccess file
RewriteEngine on
RewriteCond %{HTTP:X-Forwarded-Proto} !https
RewriteRule ^.*$ https://%{SERVER_NAME}%{REQUEST_URI} [L,R=301]
Note that you can force people to use TLS but as noted in the link above, this can be tricky and can potentially lock out users so I haven’t tried it. I don’t see what the advantage would really be though as by enforcing TLS you may deter users who want to use an unencrypted connection. I don’t have anything sensitive on this site or I may think twice about forcing TLS use.
IMPORTANT! Don’t have this .htaccess file in place if you are trying to install WordPress. Wait until you have your WordPress installation working with HTTPS before you put this .htaccess file in place or it throws up all sorts of annoying errors. Just move it out of the directory while setting up WordPress initially then move it back.
Useful sources
https://faq.nearlyfreespeech.net/section/ourservice/sslcertificates#sslcertificates
https://faq.nearlyfreespeech.net/full/tlschain#tlschain
http://wiki.stocksy.co.uk/wiki/Using_StartCom_(StartSSL)_to_Generate_valid_SSL_Certificates
https://www.thesubtlety.com/renewing-your-startcom-ssl-cert/
https://www.digitalocean.com/community/tutorials/how-to-set-up-apache-with-a-free-signed-ssl-certificate-on-a-vps
https://members.nearlyfreespeech.net/faq?q=EnforceSSL#EnforceSSL
Here's a super simple way to implement encryption on NearlyFreeSpeech:
https://members.nearlyfreespeech.net/forums/viewtopic.php?t=8567&postdays=0&postorder=asc&start=0